Right Side Down
Having made the crucial decisions, it’s time to start scanning. Be careful when putting negative strips in the tray; they’re supposed to go emulsion-side down. That means the writing along the edges will be backwards. My strips, though only 2 months old, have significant concavity. When I put them in emulsion-side up, which made it slightly easier to lock them in place, the resulting scans were woefully out of focus. I couldn’t figure out why this beautiful new scanner produced such lousy images until I flipped the strips.
Correction Tools
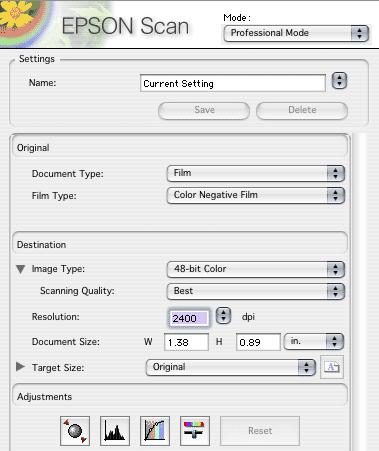
I’m running the Epson scan software as a Photoshop plugin instead of standalone since I’ll want to correct each image in Photoshop anyway. Opening it up in Professional mode shows places to plug in the document and film types (film, color negative film), image type (48-bit), scanning quality (obviously best), and resolution (2,400dpi). Document size defaults to standard 35mm size but can be changed if you want to scan only a portion. Target Size is a little confusing, but you want to leave it at Original. Any other setting will have the scanner resampling the image, and it’s better to leave that to Photoshop.
Under Adjustments, we find some settings we haven’t discussed yet. First are four unlabeled icons that represent Auto Exposure, Histogram, Levels, and Densitometer. Auto Exposure estimates the white and black point settings, as well as a gamma; Histogram, Levels, and the Densitometer let you adjust those settings manually. Confused by all those terms? Basically, these settings help the scanning software decide which pixels should be pure white and pure black, and which represent a middle luminosity value. The software then corrects the scanned color values based on those guesses. Here again, Photoshop is significantly better; click the Reset button so the scanning software won’t do any color correction.
Here’s a comparison. The image on the left used the Epson software’s Auto Levels; that on the right was manually corrected in Photoshop.
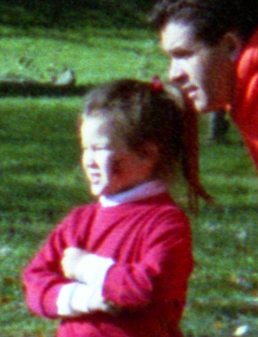
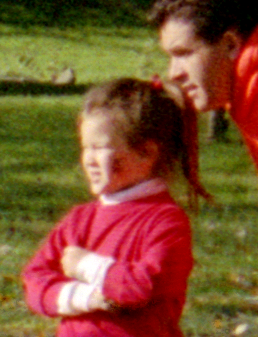
Not only do the colors on the left look awful, but the image has been seriously “clipped.” This means that colors close to white or black have been pushed to actual white or black. Note the loss of detail in the girl’s cuffs.
Below the icons are checkboxes for the Unsharp Mask Filter, Grain reduction, and Dust Removal. Photoshop is much better at sharpening (which is actually what the Unsharp Mask
filter does). Moreover, sharpening should be the last step in correcting your image. You probably won’t pick up any grain (i.e., the texture of the film itself) at 2,400dpi, but even if you did you should deal with it in Photoshop or a dedicated plugin. The Epson software gets rid of grain by indiscriminately blurring the image. Sure, the grainy dots are gone…but so are details of your image. Ditto for Dust Removal. Uncheck all three of these boxes.
The moral: Use the Epson software for scanning. Use Photoshop for correcting.
Next: The important exception