Having settled on the proprietary Epson scanning software and 48-bit color, the next most important choice is what resolution to scan at, or how many dots of information to gather. Obviously, the more merrier…up to a point. Again, the human eye can’t resolve more than about 300 dots per inch (300dpi), so there’s no need to save your final scans at a higher resolution for any given size.
(By which I mean: Size and resolution are inextricably linked. 300dpi does no good if your image is 300 pixels square and you want it to print at 3 inches square. That would be a resolution of only 100dpi. So make sure you have 300dpi at the size you want…nearly all my photo scans will be the standard 4″ x 6″, so to be 300dpi they must be 1,200 x 1,800 pixels.)
Again, negatives contain much more detail than prints (which is why you can enlarge a negative cleanly, but blowing up a print makes it fuzzy). So whenever possible, I’ll scan the negative. Luckily, I’m a packrat and still have most negatives. Since 35mm negs are only 1.4″ x 0.9″, a little basic math tells me that to get an 1,800-pixel-wide final image, I’ll have to scan at least 1,285dpi.
Actually, I scan at a higher resolution, because Adobe Photoshop (my image editor) is better at shrinking pictures than the scanner. You get best results by starting with as much information as possible and letting Photoshop decide how to “downsample” to your final resolution and size. The 4870 has a maximum resolution of 4,800dpi (optical; beware higher stated resolutions that actually rely on software interpolation), so that was my first setting. But other factors come into play.
For one thing, 35mm film doesn’t generally contain more information than ~2,000 to ~4,000 dpi. My Kodak Gold 400 ISO seems to be about 3,000dpi. So scanning more than that doesn’t produce more information or better detail…it just divides the existing detail into smaller dots.
Also, more resolution means more pixels means bigger files. Scanning a negative at 2,000dpi produces a 30MB file; scanning at 4,800dpi gives a 165MB file. The 4870 has great negative trays that can hold 4 strips at at time, about 16–20 negatives, but if your system chokes from lack of memory or disk space, you’re back to scanning one at a time.
In practice, 2,400dpi seems to be right. Below are two scans of the same negative, one at 2,400dpi and one at 4,800dpi. I’m not even going to tell you which is which, because they’re almost impossible to tell apart. (View the source code if you’re curious.)
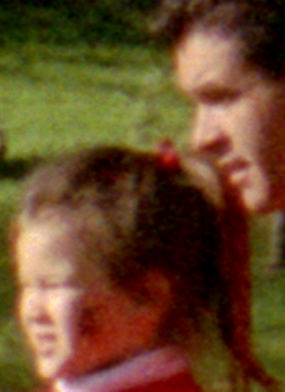
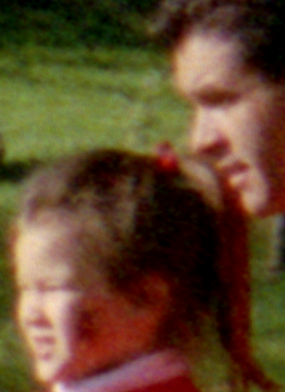
Two notes about the pictures:
- The only web format that can display photographs with no distortion is PNG. If you can’t see the images, your browser doesn’t handle PNG. Take a moment to get a better browser, like Safari or Firefox.
- If you think the pictures look lousy and blurry…you’re right! But these people aren’t the actual focus of the picture. In fact, they take up only about 1″ of the original 4″ x 6″ photo. On the negative, that’s about 0.12″. Also, some blurriness is unavoidable during the scanning process. That can be fixed in your image editor, though, so don’t despair.